How to Deploy Contract to Story Protocol with Remix(EP4)
After spending some time running nodes, I decided to switch things up a bit and dive into deploying a smart contract on the Story Protocol…

After spending some time running nodes, I decided to switch things up a bit and dive into deploying a smart contract on the Story Protocol. If you’ve already read my previous article, “Deploying a Smart Contract on Soneium with Remix,” you’ll find this process quite similar, but with a few specifics tailored to the Story Protocol.
The great thing is that once you’ve completed this, you can easily switch your network in MetaMask and deploy to any chain that supports Solidity!
For those unfamiliar, Remix is a free, web-based IDE that’s super easy to access — just head over to: https://remix.ethereum.org/
So, let’s dive in and get started!
1. Faucet
If you already have some $IP, feel free to skip ahead to Step 2: Writing the Code in Remix.
For those who need $IP, head over to the Story faucet website and request it. At the moment, the faucet allows you to request 1 $IP per day, which is more than enough for our needs. You’ll only require about 0.00404782 $IP to deploy the contract.
URL: https://faucet.story.foundation/

2. Write code in Remix
If you’re new to Remix or the Solidity programming language, I suggest starting with the basic tutorials from Base. They offer some fantastic guides on writing and deploying contracts using Remix and Solidity. Alternatively, you can check out this helpful YouTube video. Trust me, it’s easier than you might think, especially if you already have some programming experience.
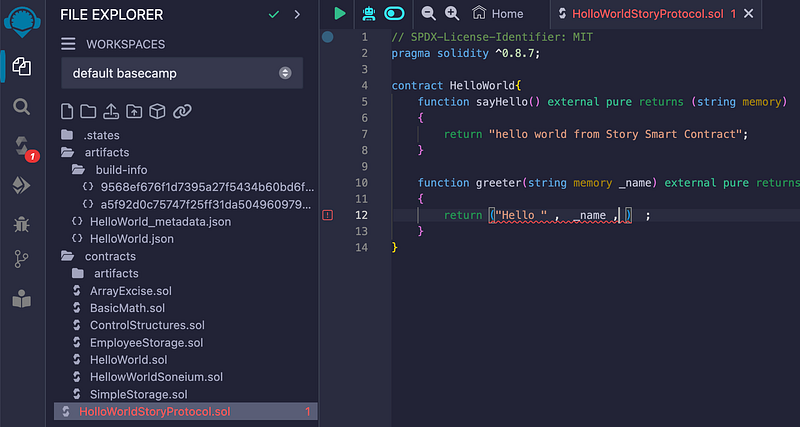
To get started, I created a new file in the contracts folder called HelloWorldStoryProtocol.sol, as shown in the picture below.

After you create the file, just use the code below.
// SPDX-License-Identifier: MIT
pragma solidity ^0.8.7;

contract HelloWorld{
    function sayHello() external pure returns (string memory)
    {
        return "hello world from Story Smart Contract";
    }

    function greeter(string memory _name) external pure returns (string memory, string memory)
    {
        return ("Hello " ,  _name  )  ;
    }
}
Now, it’s time to test and deploy your contract. One of the great features of Remix is its automatic compilation. Each time you write or modify your code, Remix will automatically compile it for you — no need to click any extra buttons!
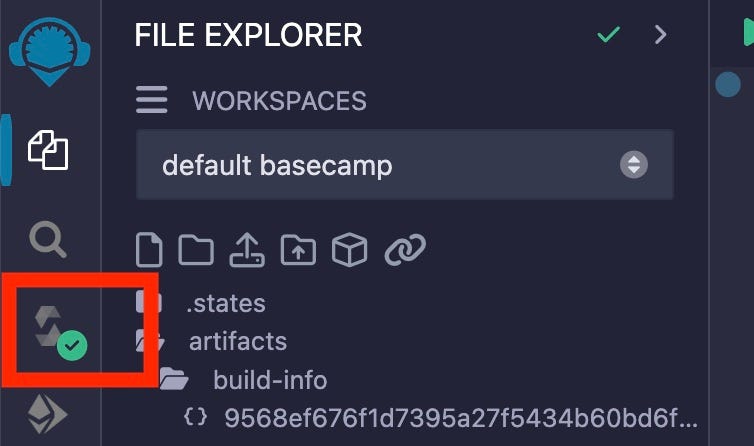
If everything is correct, you’ll see a green checkmark on the third icon in the Remix toolbar, indicating a successful compilation. This means you’re ready to move on to the deployment step.
If there are any issues with your code, it will look something like the image below. You’ll notice a red checkmark on the third icon in the toolbar and an exclamation mark on line 12. These indicators help you quickly identify where the problem is, so you can fix it and recompile.
3. Deploy contract
To deploy your contract, click on the 4th icon from the top (highlighted in the red box below). This will display the deployment parameters. By default, Remix will set the environment to “Remix VM (Cancun),” which is a virtual environment used solely for testing purposes. Keep in mind that this is not a real deployment; it’s just a safe space to test your contract.

For me, I use MetaMask. Before you proceed, make sure to switch to the Story Protocol Network and select the account where you have your $IP tokens.
In the “Environment” dropdown, choose the option “Injected Provider — MetaMask.” Personally, MetaMask is my favorite tool for testing deployments. I’ve tried using the Rabby wallet, but I found it to be less stable on certain chains.

After that, you should be all set for deployment! Click the Deploy button (the orange button). Once you do, MetaMask will pop up, showing the gas fees and asking for your confirmation.
What are we waiting for? Go ahead and click Confirm!

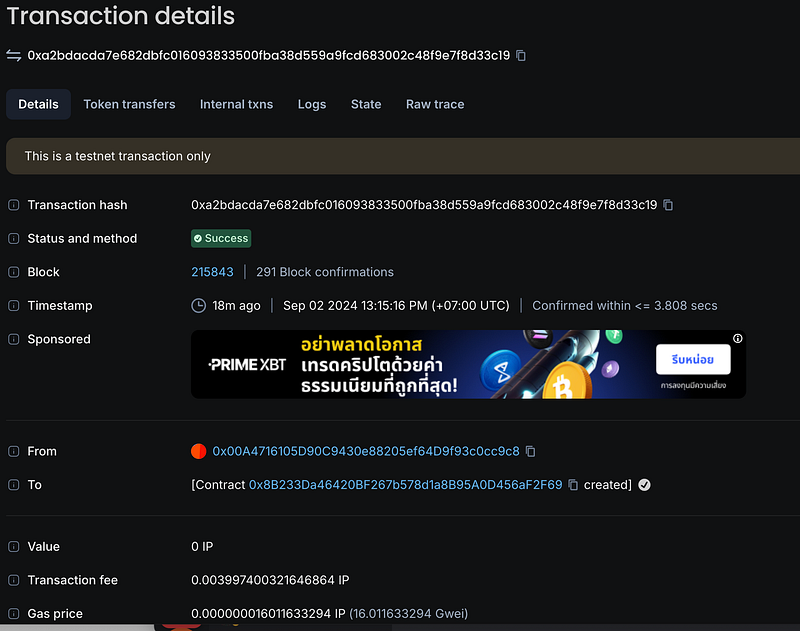
Once the deployment is complete, you can check out the details on the Story Explorer. Just head over to https://explorer.story.foundation/ and look up your transaction.
Here’s the link to my transaction as an example: 0xa2bdacda7e682dbfc016093833500fba38d559a9fcd683002c48f9e7f8d33c19
4. Test the result
After you deploy the contract, you should see a result similar to the image below. This confirms that your deployment was successful and that the contract is now live on the network.

On the left pane (number 1 in the red box), you’ll see the new contract address appear. On the right side (number 2), you’ll find the contract details. If you see both of these, you’ve successfully deployed your contract!
Next, let’s see how it works! The code we deployed is quite simple and contains two functions:
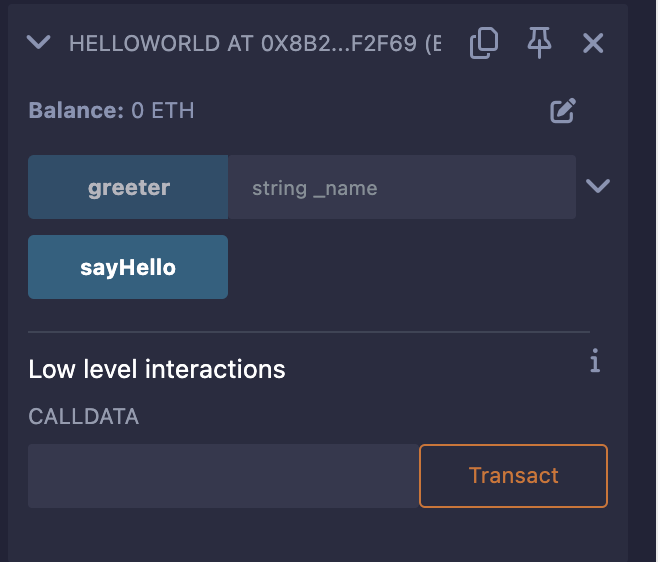
- sayHello: This function requires no input. When you click it, it returns the message:
"string: hello world from Story Smart Contract". - greeter: This function takes an input and shows the message in the format:
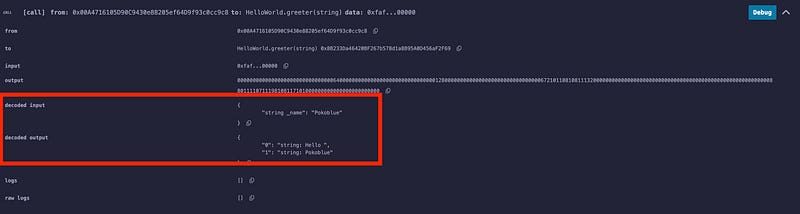
"0": "string: Hello ", "1": "string: [Your Input]". For example, if your input is "Pokoblue," it will display:"0": "string: Hello ", "1": "string: Pokoblue".
The image below shows the output from the sayHello function:

And the image below displays the output from the greeter function:
Congratulations! Your contract is now live on the Story Protocol testnet! 🎉
Thank you for reading — I hope you enjoyed this tutorial. Happy coding!