Running VANA Validator & Deploy Token Contract (EP1)
If you’ve read my previous articles, you’ll know that my magic number for airdrop is any project with $20+ million in funding. Well, here…

If you’ve read my previous articles, you’ll know that my magic number for airdrop is any project with $20+ million in funding. Well, here we are: Vana has secured $25 million in Series A funding. With the next bull run, what would you expect in the following funding rounds?

Today, I’ll focus on setting up a validator node. The workflow below might look complicated, but trust me — if I can do it, so can you.

Long story short:
- Setup: Install prerequisites, configure MetaMask, and create wallets.
- DLP Contract: Generate keys, deploy contracts, and configure the DLP.
- Validator: Register the validator and run it in service mode.
Before I begin, I’d like to give a shoutout to Joseph Tran. I’ve learned a lot from his guide: https://service.josephtran.xyz/testnet/vana/installation. It’s always my go-to resource when installing a node.
1. Initial setup
1.1 Install prerequisites
We will install git, python, poetry, node.js and npm.
#install git curl
sudo apt update
sudo apt install software-properties-common
sudo apt install git curl

#install python
sudo add-apt-repository ppa:deadsnakes/ppa
sudo apt update
sudo apt install python3.11 python3.11-venv python3.11-dev

#install poetry
curl -sSL https://install.python-poetry.org | python3 -
echo 'export PATH="$HOME/.local/bin:$PATH"' >> $HOME/.bash_profile
source $HOME/.bash_profile
poetry --version

#install npm
curl -o- https://raw.githubusercontent.com/nvm-sh/nvm/v0.40.0/install.sh | bash
echo 'export NVM_DIR="$HOME/.nvm"' >> $HOME/.bash_profile
echo '[ -s "$NVM_DIR/nvm.sh" ] && \. "$NVM_DIR/nvm.sh"  # This loads nvm' >> $HOME/.bash_profile
echo '[ -s "$NVM_DIR/bash_completion" ] && \. "$NVM_DIR/bash_completion"  # This loads nvm bash_completion' >> $HOME/.bash_profile
source $HOME/.bash_profile
nvm install --lts
node -v
npm -v
Installing all these components takes less than 5 minutes. Ensure there are no errors. I always use a fresh virtual machine for each node to avoid package dependency issues. If you’re running multiple nodes on the same machine, be aware of potential conflicts, especially with node and Python versions. Plan accordingly!!!
1.2 Install Vana-dlp-chatgp
Next, we will install vana-dlp-chatgpt and vana-CLI. It will take about 3-5 minutes depending your internet speed.
#close vana-dlp-chatgpt
git clone https://github.com/vana-com/vana-dlp-chatgpt.git
cd vana-dlp-chatgpt

#Install python dependency tool (this is your real life saver)
poetry install
Next, install node version manager (nvm)
# get files
curl -o- https://raw.githubusercontent.com/nvm-sh/nvm/v0.40.0/install.sh | bash

#set env variable
echo 'export NVM_DIR="$HOME/.nvm"' >> $HOME/.bash_profile
echo '[ -s "$NVM_DIR/nvm.sh" ] && \. "$NVM_DIR/nvm.sh"  # This loads nvm' >> $HOME/.bash_profile
echo '[ -s "$NVM_DIR/bash_completion" ] && \. "$NVM_DIR/bash_completion"  # This loads nvm bash_completion' >> $HOME/.bash_profile

source $HOME/.bash_profile

#install
nvm install --lts

#check version-
node -v
npm -v
You should get this:

1.3 Install pip & Vana CLI
This part was tricky for me because I did a fresh Python install, which included PEP 668, requiring a virtual environment to manage pip. In short, it’s a more secure approach that helps manage Python in the long run.
It seems that pip versions before 22.3.1 don’t have this issue since PEP 668 wasn’t implemented yet. So, if you’re using pip version 22.3.1 or earlier, you can skip straight to the Vana CLI installation command.
#This part is option if your pip is V22.3.1 or lower
#install venv managed library
sudo apt install python3.12-venv

#create virtual environment
python3 -m venv myenv

#Activate
source myenv/bin/activate
Install Vana CLI
pip install vanaexpected result:

1.4 Create Wallet
We’ll create coldkey and hotkey wallets using the command line. Afterward, we’ll import them into MetaMask using the private key (not the mnemonic).
- Coldkey: This will be used for staking.
- Hotkey: This will be used by the validator to manage transactions.
This single command line below will help you create both wallets.
vanacli wallet create --wallet.name default --wallet.hotkey defaultThere are two tables showing the mnemonic keys. Write them down offline — do not copy them to any online tools like Notepad, Notion or other cloud services. If you do, I might find your house (joking). But hackers won’t joke — they can easily access and drain your wallet. Imagine you’re eligible for the airdrop, but when you claim it, all the tokens are automatically transferred to a hacker. That’s the last thing I want to happen to anyone.

Next, we will export private key of both wallets and restore them in metamask.
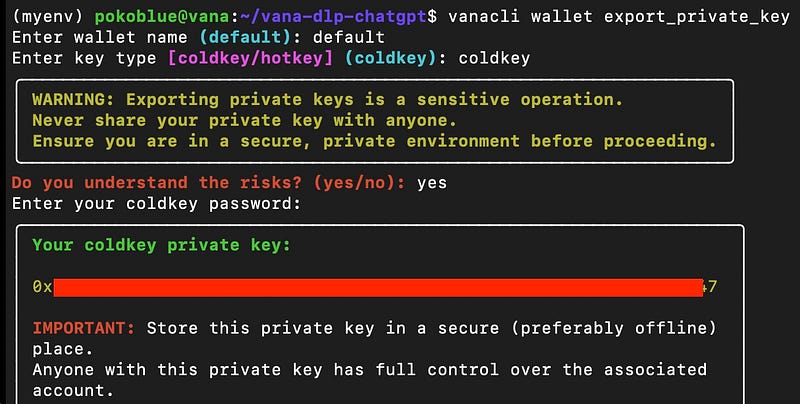
#Export command
vanacli wallet export_private_key
Once you enter the command, you’ll need to specify the wallet name and key type.
- Wallet name: default
- Key type: coldkey
The command is the same for both cold and hot wallet keys. Just repeat the process for the hot wallet key.
Import both cold and hot wallet private key to metamask.


Also, add testnet to metamask
- Network name: Satori Testnet
- RPC URL: https://rpc.satori.vana.org
- Chain ID: 14801
- Currency: VANA
1.5 Fund your wallet with VANA
For this step, it is quite easy. Just head over to https://faucet.vana.org to get VANA token. I got 0.5 NAVA every 24hr.
2. Create DLP
2.1 Create encryption key
In this process, we’re generating a PGP key pair to encrypt and sign data, which is similar to installing SSL/TLS for securing a website. Just like SSL/TLS secures web traffic using a public/private key pair, PGP does the same for encrypting files or communications, but it’s more general-purpose and not limited to web domains.
./keygen.shImage below show prompt and output:
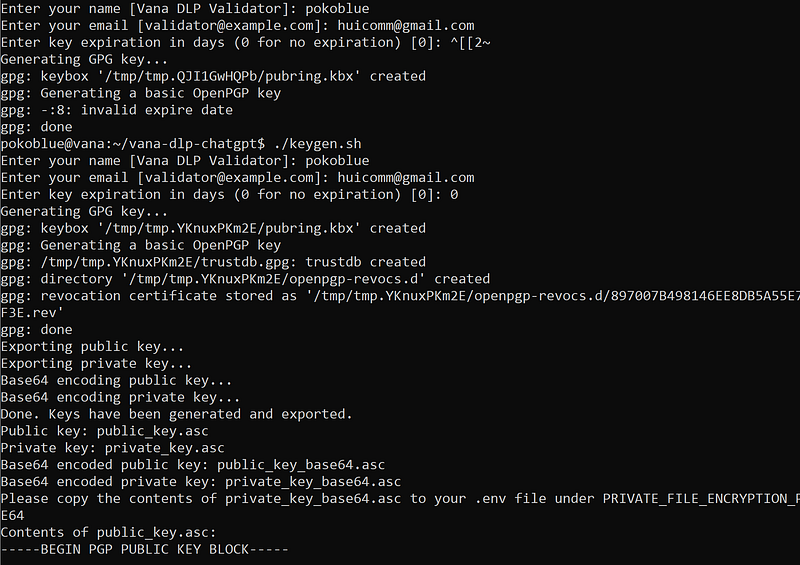
The output contains two sets of keys: a public key and a private key. Both keys are provided in two formats — readable ASCII and Base64-encoded:
public_key.asc: The public key (ASCII format).public_key_base64.asc: The Base64-encoded public key.private_key.asc: The private key (ASCII format).private_key_base64.asc: The Base64-encoded private key.
2.2 Deploy contract
Here comes the fun part! We’ll install some dependencies, clone, and set up the smart contract for your coin. Now’s the time to start imagining what meme coin name you want to create. “Pokoblue”
#Navigate to your home directory
cd $HOME

#git clone
git clone https://github.com/vana-com/vana-dlp-smart-contracts.git

#navigate inside smart contract directory
cd vana-dlp-smart-contracts

#install yarn
npm install -g yarn
yarn --version
yarn install
Next, we’ll configure the settings. There’s a sample file called .env.example; simply copy it and rename it to .env to make it a real configuration file
#copy file
cp .env.example .env

#nano
nano .env
Config your coldkey wallet public and private key. (step 1.4)

Save and exit. Next, we will deploy the contract.
Before proceeding, make sure your coldkey wallet has some VANA from the faucet. You’ll need it for gas fees.
#deploy contract
npx hardhat deploy --network satori --tags DLPDeploy
We will use hardhat to deploy contract. Just run the command above. The result should be something like this.

Next, we will verify the DLP what we have deployed. (use 2nd address in the pic above)
#replace 0x with your address
npx hardhat verify --network satori 0x2b0F66D5153026d99cEf7bADADC4E4e987a6a910
You will have to verify the Token smart contract also. (1st address in the pic)
npx hardhat verify --network satori <DataLiquidityPoolToken address> "<DLP_TOKEN_NAME>" <DLP_TOKEN_SYMBOL> <OWNER_ADDRESS>
2.3 Config ABI
Next, we’ll interact with the contract via the explorer. Visit the following URL and input your contract:
url: https://satori.vanascan.io/
Connect your coldkey wallet to the explorer, navigate to the ‘Contract’ tab, and select ‘Write Proxy.’ You’ll interact with two methods (ensure you have enough VANA for gas fees).
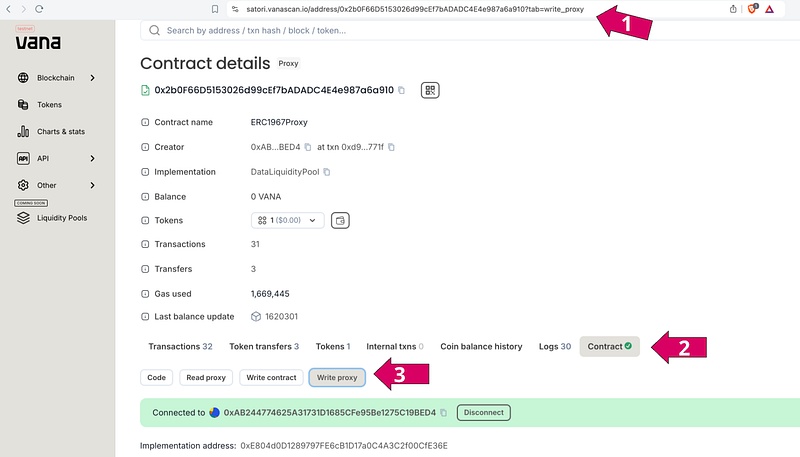
For the 4.addRewardsForContributors, set the value to 1000000000000000000000000 (1 Million) token.

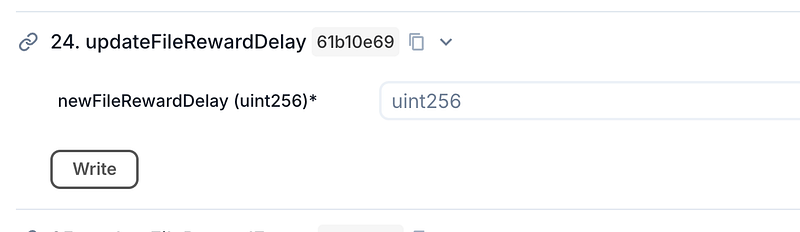
For 24.updateFileRewardDelay, set the value to 0 and click 'Write.' MetaMask will prompt you to sign the transaction.
3. Register Validator
3.1 Fund Validator with DLP Tokens
Fund the validator with DLP tokens. Using MetaMask, send at least 10 of the tokens you created to both your coldkey and hotkey wallets. For my token, Pokoblue (symbol: PKB), I sent 100,000 PKB. You’ll need to send at least 10 of your own tokens.


3.2 Setup .env
Before we runnign the validator, we have to setup the .env file to make thing run properly.
#navigate to
cd $HOME\vana-dlp-chatgpt

#nano
nano .env
Next, past the following and change the parameters
# The network to use, currently Vana Satori testnet
OD_CHAIN_NETWORK=satori
OD_CHAIN_NETWORK_ENDPOINT=https://rpc.satori.vana.org

# Optional: OpenAI API key for additional data quality check
# For this OpenAI API key, I get it from chatgpt website.
# You might skip this since this is optional in the parameter
# OPENAI_API_KEY="YOUR_OPENAI_API_KEY"

#Your own DLP smart contract address once deployed to the network, useful for local testing
#DataLiquidityPool address
DLP_SATORI_CONTRACT="0x......YOUR_DLP_CONTRACT_POOL"

#Your own DLP token contract address once deployed to the network, useful for local testing
#DataLiquidityPoolToken address
DLP_TOKEN_SATORI_CONTRACT="0x.....YOUR_DLP_TOKEN_CONTRACT"

# The private key for the DLP
# I got it from public_key_base64.asc
PRIVATE_FILE_ENCRYPTION_PUBLIC_KEY_BASE64=".............Your Private Key ..............=="
3.3 Register Validator
#navigate to vana-dlp-chatgpt
cd $HOME/vana-dlp-chatgpt
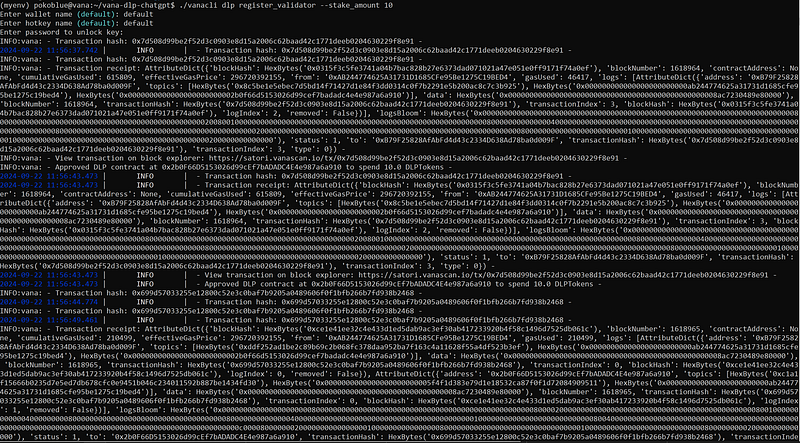
#run!!!
./vanacli dlp register_validator --stake_amount 10My Result:
#Approve validator
./vanacli dlp approve_validator --validator_address=<your hotkey address from Metamask>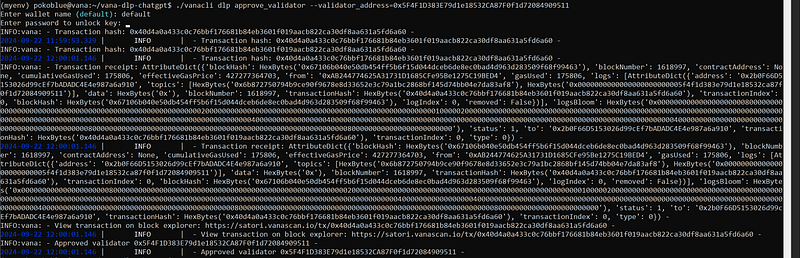
3.4 Run Validator
Here the moment of truth. Run this command.
poetry run python -m chatgpt.nodes.validatorYou should get this:


From the log, if you see ‘INFO — no files to verify,’ that should be normal. At the very least, you should see some successful transactions. Congratulations!
3.5 Register the validation in quest:
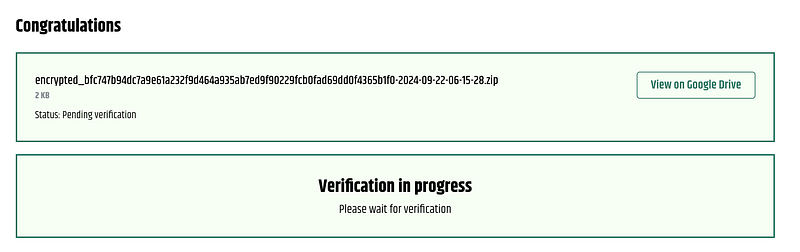
Head over to the website and follow the instructions. I recommend creating a new ChatGPT account since the quest will ask you to input your wallet address in ChatGPT and verify it by exporting data. Then, uploading it in the qeust website.
In my case, the exported data was almost 18MB and included all my conversations. For this testing purposes, I prefer not to share that information.
Quest: https://dlp-ui.vercel.vana.com/claim/upload
After the upload, let wait for verification.
That’s all for today. I hope you can successfully run your validator node. If you have any questions or get stuck somewhere, you can head over to Discord, tag me, or ask for help from anyone.
Thank you for reading.